Pegasus Drone v1.0.0
CAD Model
The lastest CAD model for the Pegasus Drone can be found in the Pegasus CAD repository under a Creative Commons Non-Commercial & Non-Military License.

Bill of Materials
In order to replicate the Pegasus Drone, the following components are required:
1x 1Tb NVMe SSD PCIe 4.0
1x Battery 4S 4300mAh
1x Set of jumper dupont wires
1x XT60 cable connector
PX4 Configuration for Indoor Flight
Flashing the Jetson Orin Nano
In order to setup the Jetson Orin Nano Developer Kit, follow the instructions bellow.
Start by installing the Nvidia SDK manager on a machine with Ubuntu 22.04LTS or later.
Connect the Jetson Orin Nano Developer Kit to the machine using a USB-C cable.
Short the FC REC and GND pins on the Jetson Orin Nano Developer Kit, under the SoC module.
Connect the Jetson Orin Nano Developer Kit to the power supply.
Before opening the Nvidia SDK Manager, make sure to turn off the Ubuntu Firewall (if enabled) by running the following command:
sudo ufw disable
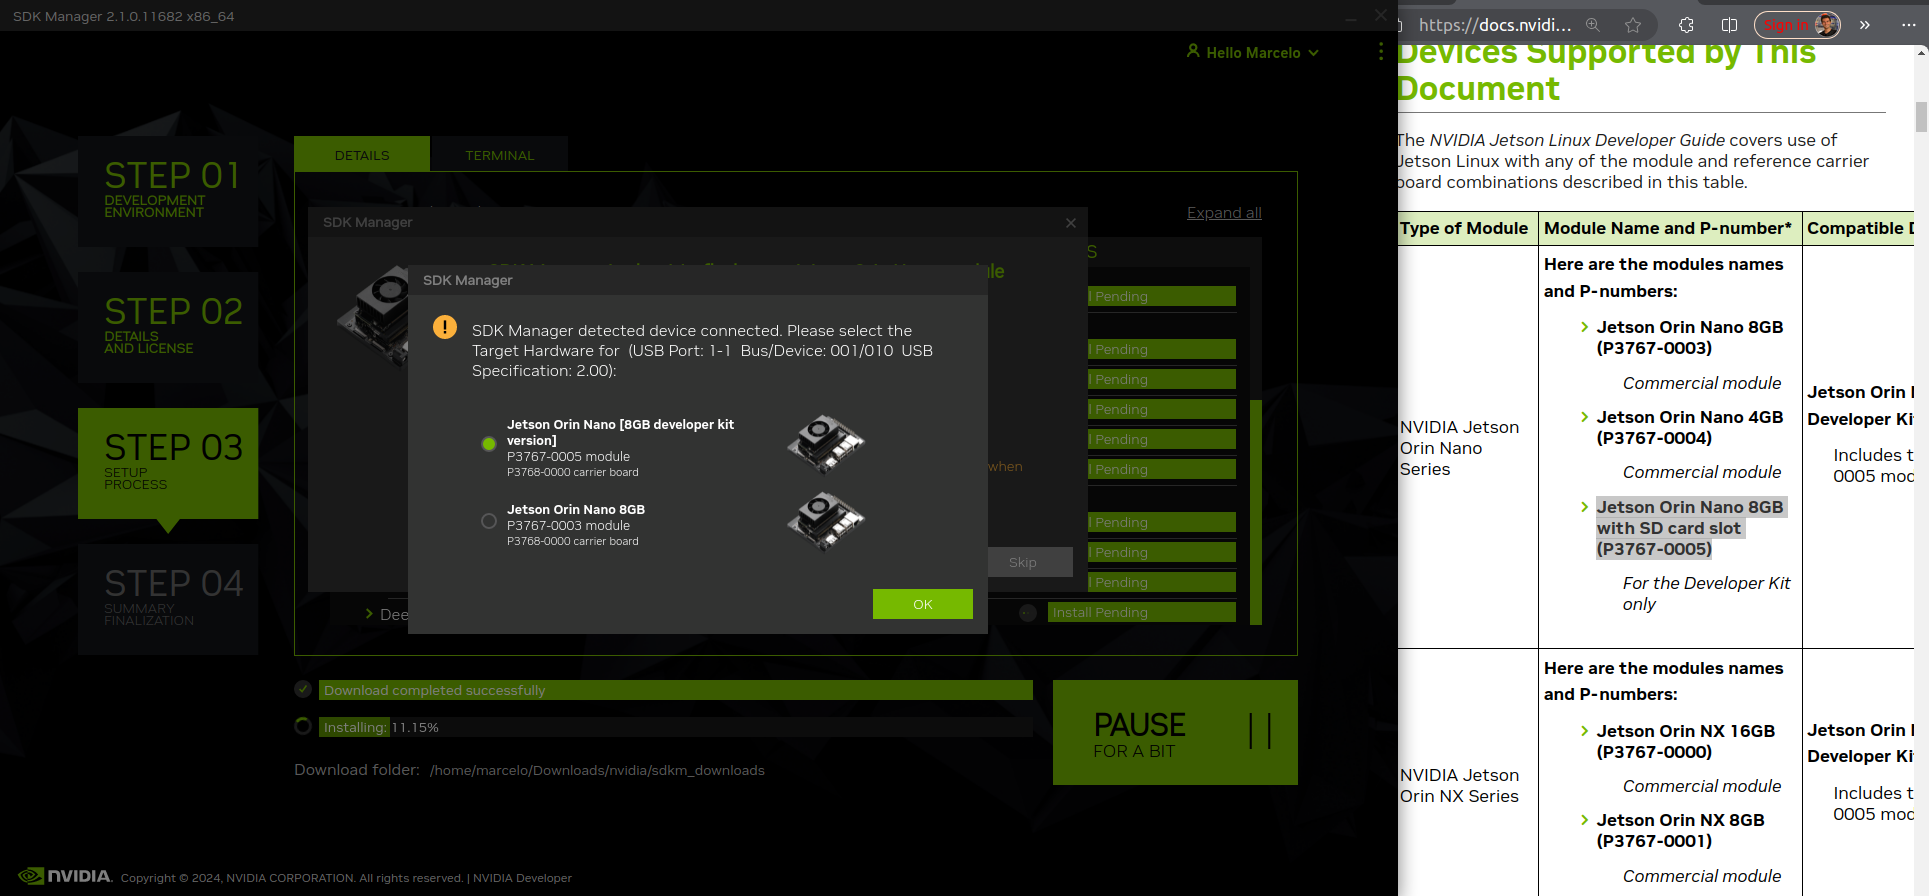
Open the Nvidia SDK Manager and select the Jetson Orin Nano Developer Kit from the list of devices.

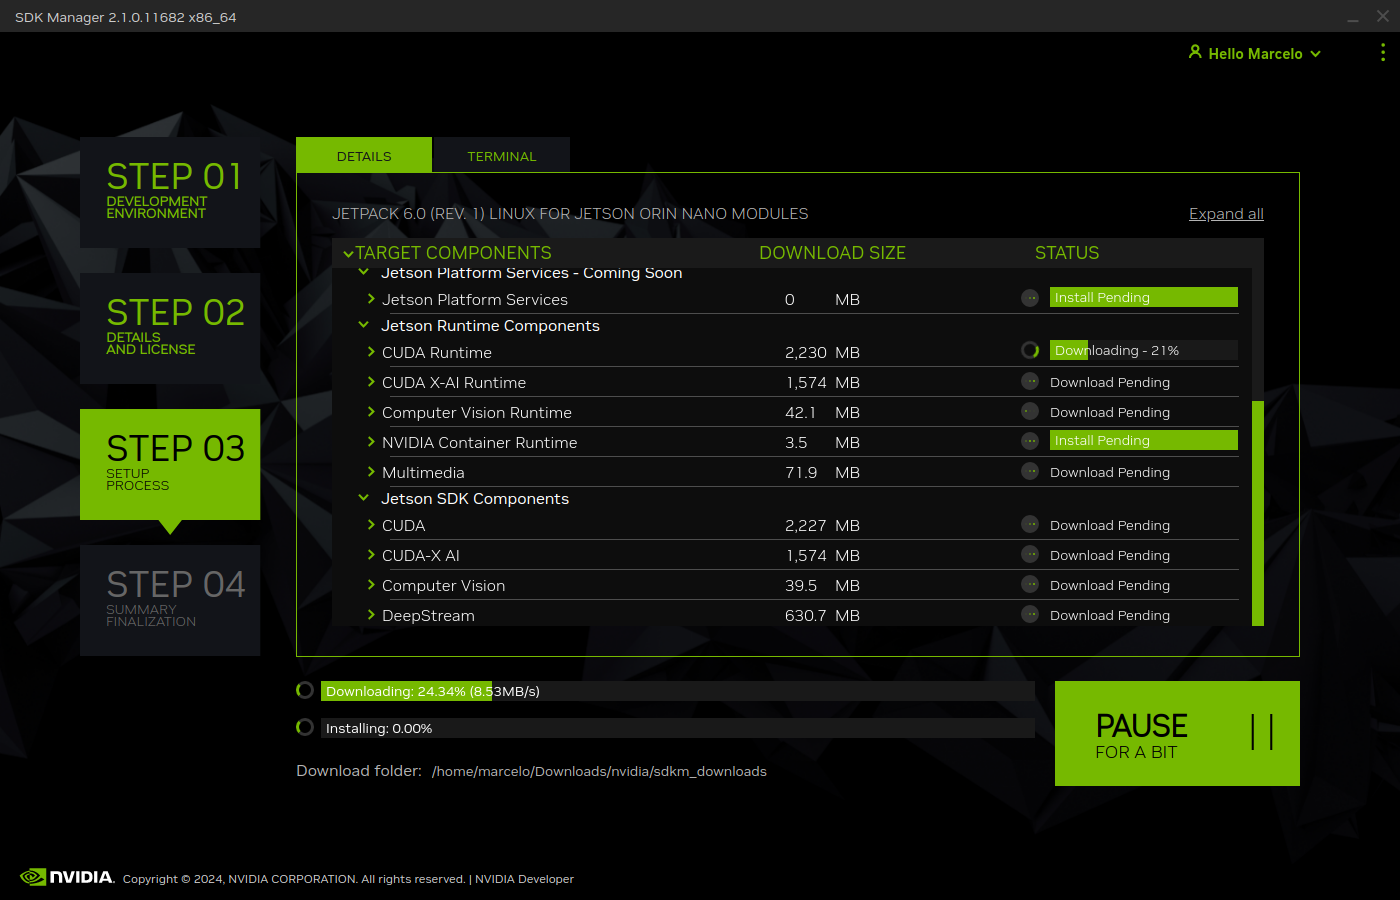
Select all the modules that can be installed and the latest jetpack version.

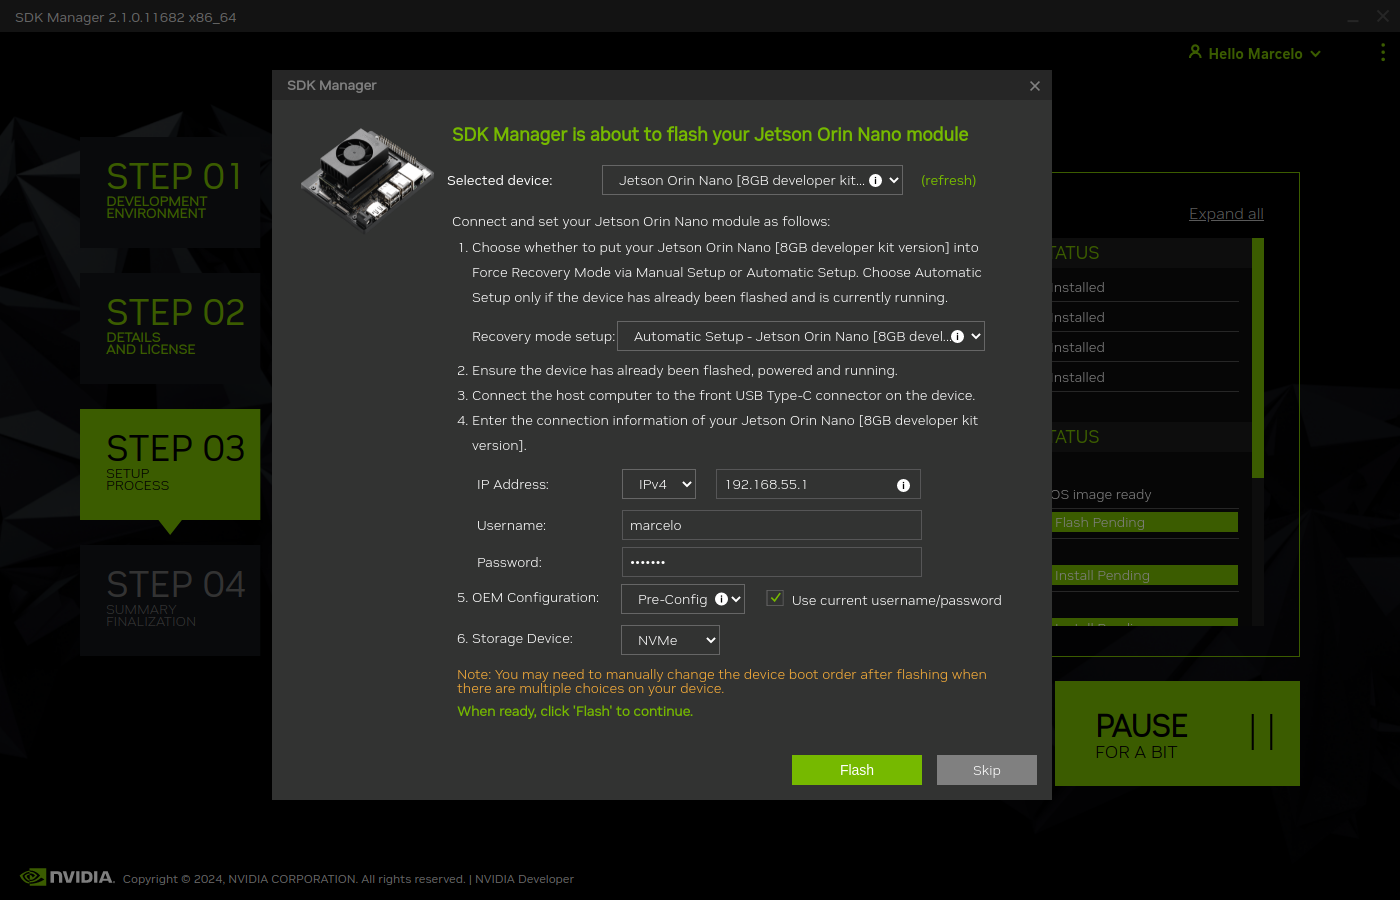
After the OS is installed, the Jetson Orin Nano Developer Kit will reboot and you will be prompted to enter the defined username and password for the installation to continue.

9. After this step is finished, you can unplug the Jetson Orin Nano Developer Kit from the power. Remove the short between the FC REC and GND pins and connect the Jetson Orin Nano Developer Kit to the power supply again. Don’t forget, it you disabled the Ubuntu Firewall, you should enable it again by running the following command:
sudo ufw enable
You can find more information on the Nvidia Jetson Orin Nano Developer Kit page.
Connecting the Jetson to Wifi
After the Jetson reboots, an SSH connection is available through the USB-C connection. SSH into the Jetson Orin Nano using the following command:
ssh <username>@192.168.55.1
Replace the <username> with the username you defined during the installation process.
Connect the Jetson to a wifi network by running the following command:
sudo nmcli device wifi connect <SSID> password <password>Wifi Connection
Replace the
<SSID>with the wifi network name and the<password>with the wifi network password. If you need to check the wifi networks available, you can run the following command:nmcli device wifi listTo check the connection status, you can run the following command:
nmcli device status
Configuring the base software
Install basic software packages by running the following command:
sudo apt update && sudo apt upgrade -y && sudo apt install -y htop tmux nano python3-pip && sudo apt autoremove
Remove “garbage” that comes pre-installed by default:
sudo apt purge thunderbird libreoffice-* firefox -y && sudo apt autoremove && sudo apt clean
Install Jetson Stats by running the following command:
sudo -H pip3 install -U jetson-stats && sudo systemctl restart jtop.service
Reboot the Jetson and SSH into the Jetson again. Run the following command:
sudo reboot
Installing OpenCV with CUDA
Install OpenCV with CUDA support
# Remove old versions or previous builds
cd ~
sudo rm -rf opencv*

# Download the latest version
git clone --depth=1 https://github.com/opencv/opencv.git -b 4.10.0
git clone --depth=1 https://github.com/opencv/opencv_contrib.git -b 4.10.0

# reveal the CUDA location
cd ~
sudo sh -c "echo '/usr/local/cuda/lib64' >> /etc/ld.so.conf.d/nvidia-tegra.conf"
sudo ldconfig

# Create the build directory
cd ~/opencv
mkdir build
cd build

# Setup the architecture for cuda in the orin nano
# Check: https://developer.nvidia.com/cuda-gpus#compute
export ARCH=8.7
export PTX="sm_87"

# Install some dependencies
sudo apt-get install -y libswresample-dev libdc1394-dev cmake libjpeg-dev libjpeg8-dev libjpeg-turbo8-dev libpng-dev libtiff-dev libglew-dev libavcodec-dev libavformat-dev libswscale-dev libgtk2.0-dev libgtk-3-dev libcanberra-gtk* libxvidcore-dev libx264-dev libtbb-dev libxine2-dev libv4l-dev v4l-utils qv4l2 libtesseract-dev libpostproc-dev libvorbis-dev libfaac-dev libmp3lame-dev libtheora-dev libopencore-amrnb-dev libopencore-amrwb-dev libopenblas-dev libatlas-base-dev libblas-dev liblapack-dev liblapacke-dev libeigen3-dev gfortran libhdf5-dev libprotobuf-dev protobuf-compiler libgoogle-glog-dev libgflags-dev

# run cmake
cmake -D CMAKE_BUILD_TYPE=RELEASE \
-D CMAKE_INSTALL_PREFIX=/usr \
-D OPENCV_EXTRA_MODULES_PATH=~/opencv_contrib/modules \
-D EIGEN_INCLUDE_PATH=/usr/include/eigen3 \
-D WITH_OPENCL=OFF \
-D CUDA_ARCH_BIN=${ARCH} \
-D CUDA_ARCH_PTX=${PTX} \
-D WITH_CUDA=ON \
-D WITH_CUDNN=ON \
-D WITH_CUBLAS=ON \
-D ENABLE_FAST_MATH=ON \
-D CUDA_FAST_MATH=ON \
-D OPENCV_DNN_CUDA=ON \
-D ENABLE_NEON=ON \
-D WITH_QT=OFF \
-D WITH_OPENMP=ON \
-D BUILD_TIFF=ON \
-D WITH_FFMPEG=ON \
-D WITH_GSTREAMER=ON \
-D WITH_TBB=ON \
-D BUILD_TBB=ON \
-D BUILD_TESTS=OFF \
-D WITH_EIGEN=ON \
-D WITH_V4L=ON \
-D WITH_LIBV4L=ON \
-D WITH_PROTOBUF=ON \
-D OPENCV_ENABLE_NONFREE=ON \
-D INSTALL_C_EXAMPLES=OFF \
-D INSTALL_PYTHON_EXAMPLES=OFF \
-D PYTHON3_PACKAGES_PATH=/usr/lib/python3/dist-packages \
-D OPENCV_GENERATE_PKGCONFIG=ON \
-D BUILD_EXAMPLES=OFF \
-D CMAKE_CXX_FLAGS="-march=native -mtune=native" \
-D CMAKE_C_FLAGS="-march=native -mtune=native" ..

# Compile the code
make -j 6

# Remove the old opencv installation
sudo rm -rf /usr/include/opencv4/opencv2
sudo apt purge libopencv-*

# Install the compiled library in the system
sudo make install
sudo ldconfig

# Clean the compiled code fromt the build directory
make clean
sudo apt-get update
sudo rm -rf opencv
sudo rm -rf opencv_contrib
Installing ROS 2
Install ROS 2 Humble, by following the instructions on the ROS 2 Humble page.
# Locale setup
locale  # check for UTF-8

sudo apt update && sudo apt install locales
sudo locale-gen en_US en_US.UTF-8
sudo update-locale LC_ALL=en_US.UTF-8 LANG=en_US.UTF-8
export LANG=en_US.UTF-8

locale  # verify settings

# Setup sources.list
sudo apt install software-properties-common
sudo add-apt-repository universe

sudo apt update && sudo apt install curl -y
sudo curl -sSL https://raw.githubusercontent.com/ros/rosdistro/master/ros.key -o /usr/share/keyrings/ros-archive-keyring.gpg

echo "deb [arch=$(dpkg --print-architecture) signed-by=/usr/share/keyrings/ros-archive-keyring.gpg] http://packages.ros.org/ros2/ubuntu $(. /etc/os-release && echo $UBUNTU_CODENAME) main" | sudo tee /etc/apt/sources.list.d/ros2.list > /dev/null

sudo apt update
sudo apt upgrade

# Install ROS 2 packages
sudo apt install ros-humble-desktop -y
sudo apt install ros-dev-tools -y

# Add the ROS 2 environment to the bashrc
echo "source /opt/ros/humble/setup.bash" >> ~/.bashrc
Setting up the GPIO pins
To setup the serial pins for communication with the microcontroller, follow the instructions bellow:
sudo systemctl stop nvgetty.service
sudo systemctl disable nvgetty.service
sudo usermod -aG dialout marcelo
Disabling GNOME GUI
For a better performance, it is recommended to disable the GNOME GUI. To do so, follow the instructions bellow:
# Setup the system to boot in text mode
sudo systemctl set-default multi-user.target
(Optional): Alternatively, you can remove the GUI packages altogether by running the following lines:
# Remove the GNOME GUI
sudo apt-get purge gnome-shell ubuntu-wallpapers-bionic light-themes chromium-browser* libvisionworks libvisionworks-sfm-dev -y
sudo apt-get autoremove -y
sudo apt clean -y

# Setup the system to boot in text mode
sudo systemctl set-default multi-user.target
Realsense Setup
# Based on https://github.com/IntelRealSense/librealsense/blob/master/scripts/libuvc_installation.sh

git clone https://github.com/IntelRealSense/librealsense.git -b v2.56.2

mkdir librealsense_build && cd librealsense_build

sudo apt-get install git cmake libssl-dev freeglut3-dev libusb-1.0-0-dev pkg-config libgtk-3-dev unzip -y

sudo cp ../config/99-realsense-libusb.rules /etc/udev/rules.d/
sudo cp ../config/99-realsense-d4xx-mipi-dfu.rules /etc/udev/rules.d/

# Setup the architecture for cuda in the orin nano
# Check: https://developer.nvidia.com/cuda-gpus#compute
export ARCH=8.7

cmake ../ -DFORCE_LIBUVC=true -DCMAKE_BUILD_TYPE=release -DBUILD_WITH_CUDA=true -DBUILD_EXAMPLES=true -DCUDA_ARCHITECTURES="${ARCH}"

make -j2
sudo make install

# Install the ROS 2 dependencies
sudo apt install ros-humble-image-transport ros-humble-diagnostic-updater

cd ~
mkdir pegasus_external
cd pegasus_external
mdkir src
cd src
git clone https://github.com/IntelRealSense/realsense-ros.git -b 4.56.1
cd ..
colcon build --symlink-install

# Add the ROS 2 environment to the bashrc if not already
echo "source $HOME/pegasus_external/install/setup.bash" >> ~/.bashrc
Installing Pytorch
https://docs.nvidia.com/deeplearning/frameworks/install-pytorch-jetson-platform/index.html

# Install CUSparse for accelerating computations
wget https://developer.download.nvidia.com/compute/cusparselt/redist/libcusparse_lt/linux-aarch64/libcusparse_lt-linux-aarch64-0.6.3.2-archive.tar.xz
tar xf libcusparse_lt-linux-aarch64-0.6.3.2-archive.tar.xz
sudo cp -a libcusparse_lt-linux-aarch64-0.6.3.2-archive/include/* /usr/local/cuda/include/
sudo cp -a libcusparse_lt-linux-aarch64-0.6.3.2-archive/lib/* /usr/local/cuda/lib64/
sudo ldconfig

# Check the versions + links for pytorch + tensorimage stuff
https://forums.developer.nvidia.com/t/pytorch-for-jetson/72048
export JP_VERSION=61
export PYT_VERSION=torch-2.5.0a0+872d972e41.nv24.08.17622132-cp310-cp310-linux_aarch64.whl
export TORCH_INSTALL=https://developer.download.nvidia.com/compute/redist/jp/v$JP_VERSION/pytorch/$PYT_VERSION
python3 -m pip install --upgrade pip
python3 -m pip install numpy
python3 -m pip install --no-cache $TORCH_INSTALL

# Install the corresponding torch vision (see table in their repo)
git clone https://github.com/pytorch/vision torchvision
cd torchvision/
git checkout v0.20.1
export USE_CUDA=1 USE_CUDNN=1 USE_MKLDNN=1 TORCH_CUDA_ARCH_LIST="8.6" FORCE_CUDA=1 FORCE_MPS=1
sudo apt-get -y install ffmpeg libavutil-dev libavcodec-dev libavformat-dev libavdevice-dev libavfilter-dev libswscale-dev libswresample-dev libswresample-dev libpostproc-dev libjpeg-dev libpng-dev libopenblas-base libopenmpi-dev
python3 setup.py develop --user
Installing Tensorflow
https://docs.nvidia.com/deeplearning/frameworks/install-tf-jetson-platform/index.html#overview
export JP_VERSION=60
export TF_VERSION=tensorflow-2.15.0+nv24.05-cp310-cp310-linux_aarch64.whl
export TENSORFLOW_INSTALL=https://developer.download.nvidia.com/compute/redist/jp/v$JP_VERSION/tensorflow/$TF_VERSION
sudo apt-get install libhdf5-serial-dev hdf5-tools libhdf5-dev zlib1g-dev zip libjpeg8-dev liblapack-dev libblas-dev gfortran
python3 -m pip install -U testresources setuptools numpy future mock keras_preprocessing keras_applications gast protobuf pybind11 cython pkgconfig packaging h5py
python3 -m pip install --no-cache $TENSORFLOW_INSTALL