Pegasus Drone
In this section, we describe the setup of the Pegasus 5” Prototype drone. Equipped with a KakuteH7 flight controller and an NVIDIA Jetson Orin Nano onboard computer, it enables the fast prototyping and testing of control algoritms with vision in dedicated flight arenas such as the Taguspark Flight Arena or outdoor flight.
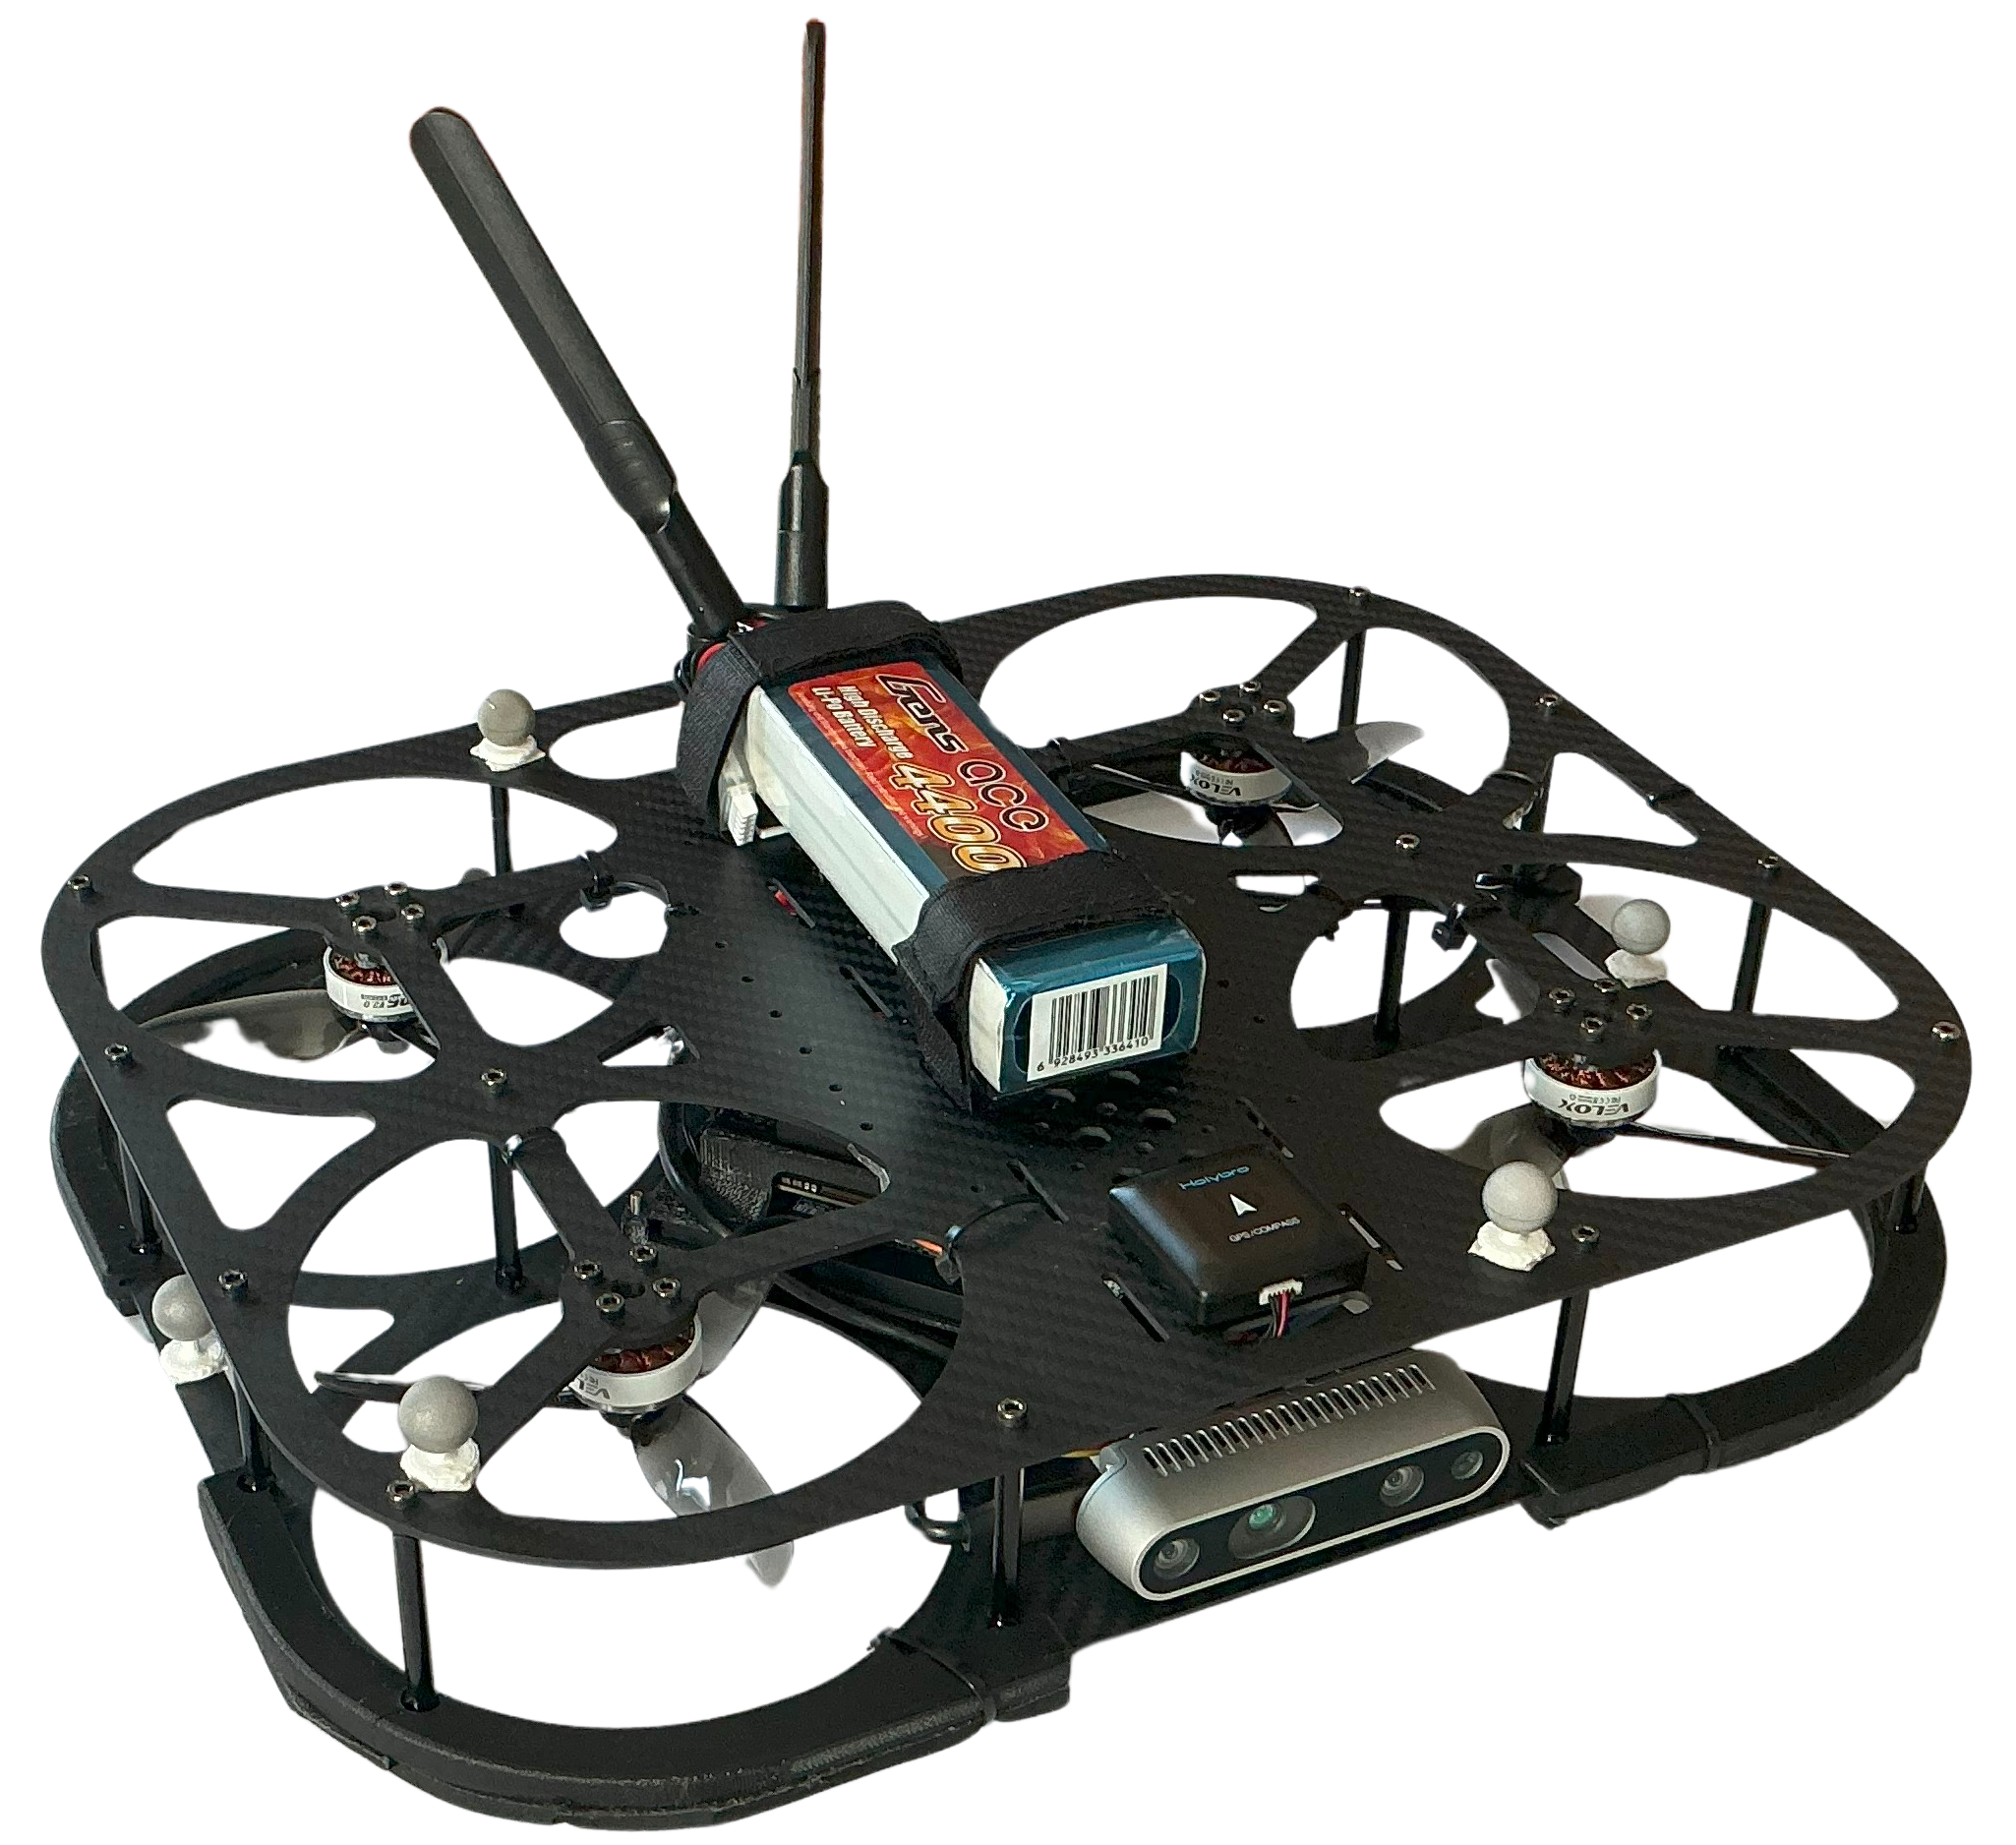
“The initial goal was to design a 3D printed drone that could be used for research and education in the field of control and robotics. Eventhough the first prototype worked, I never felt comfortable flying it near people due to the risk of a propeller breaking and causing injury. The most recent prototype was developed with a carbon fiber frame and 3D printed parts to be safer for flights near people. It is more expensive to make, but it is worth it for the added safety.” - Marcelo Jacinto
As such, now there are two models available:
Version 2 (2024-2025): This version has a carbon fiber frame and 3D printed parts. It was developed to be safer for flights near people.

Check the videos below to see the initial outdoor flight tests of the new Pegasus prototype:
First outdoor flight tests with camera pipeline:
Initial sensor calibration and outdoor control tests:
Version 1 (2023-2024): This version has a full 3D printed frame without requiring any expensive carbon fiber parts. It was developed to be a low-cost platform for research and education.

Initial control tunning and indoor tests:
Follow the steps bellow to assemble your own Pegasus drone 🚁. Get your soldering iron 🛠️ and 3D printer 🖨️ ready for an adventure!
- Drone Assembly
- Software Setup
- Flashing the Jetson Orin Nano
- Connecting the Jetson to Wifi
- Passwordless SSH
- Removing Pre-installed Software
- Installing NVIDIA Video Codec SDK
- Installing OpenCV with GPU Acceleration
- Installing ROS 2
- Setting up the GPIO pins
- Disabling GUI
- Realsense Setup
- Setup a Github SSH Key
- Installing Pegasus GNC
- Installing Machine Learning Libraries
- Installing NVSlam (for NVIDIA Jetson Orin Nano)
- Network Setup